
How to Grow and Care for Hosta Plants

Growing the Queen of Shade
The good news is that this section of the website is not very long. Hostas require little care and will live to be 30 or more years if properly cared for. While most known for thriving in the shade garden, the reality is more nuanced. The ideal situation is dappled shade. Planting hostas on the north side of the building where no sun can reach will not bring out the best in your plants.
Hostas also have a fairly wide range of sun tolerance. Some (which are highlighted in our catalog) are quite tolerant of sun, especially in more northern climates. Others, especially those with strong variegation, are more delicate and are susceptible to burning with too much sun exposure. The more sun that your plants receive, the more important that proper watering is to the plants.

Digging the Hole
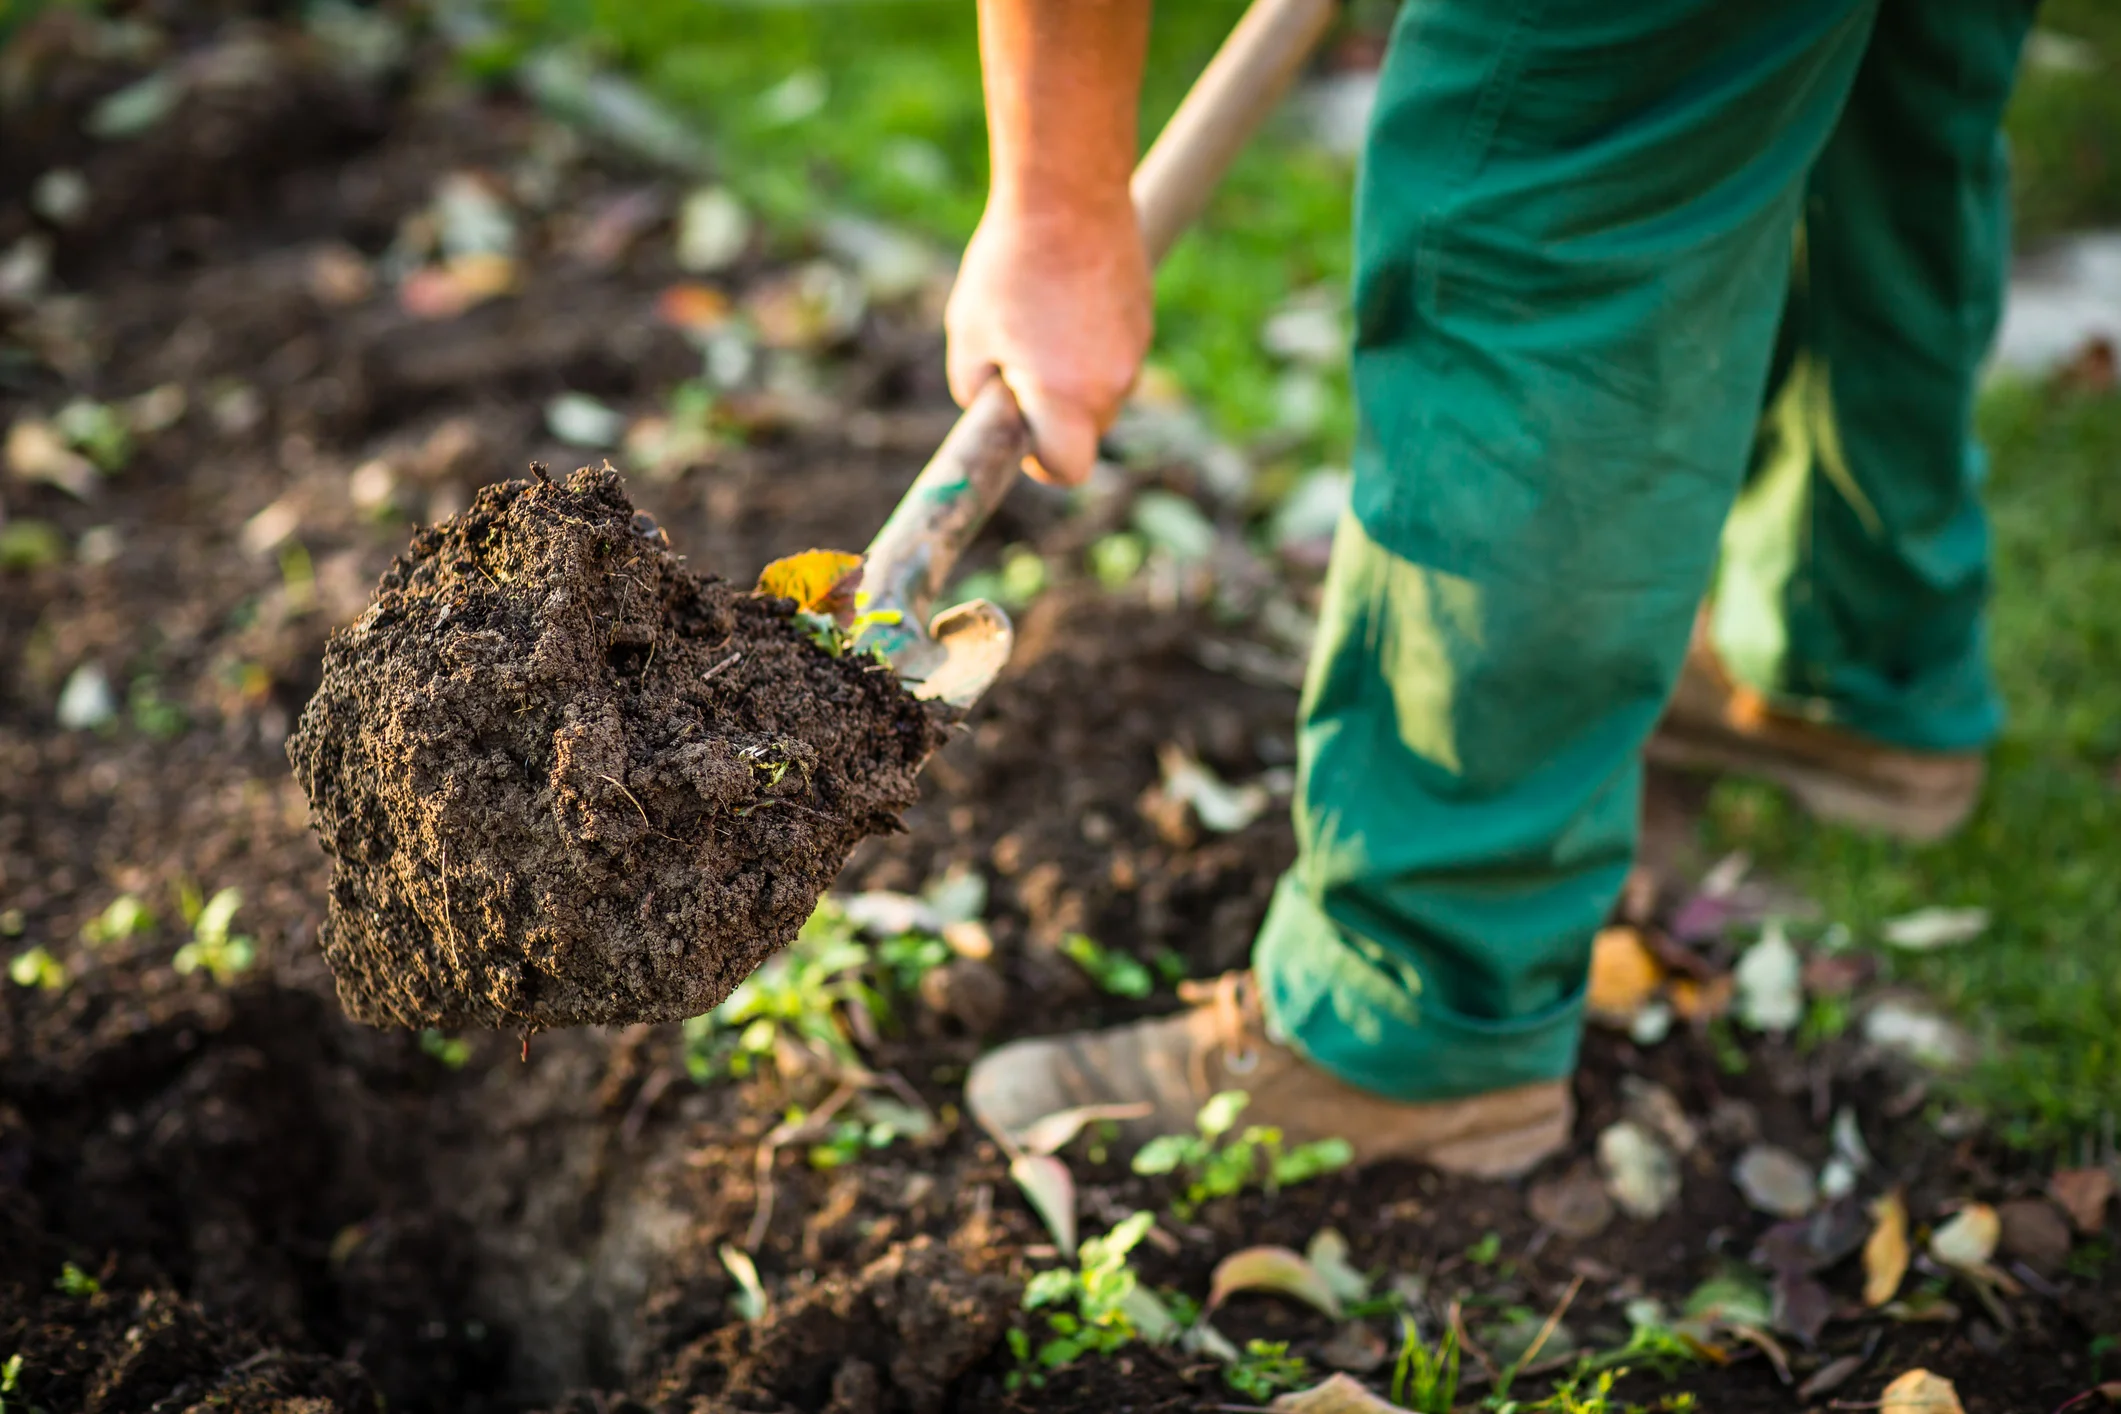
Most early stage hobbyists quickly figure out the gap between their hosta growing efforts and those seen at a display garden. Most of this gap can be closed at the time of hosta planting. The plant hole and the material that fills it makes the biggest impact on the size and vibrance of the plant for the next decade.
The hole does not need to be particularly deep--probably a foot or so, even for very large cultivars.. The horizontal distance should match the canopy of the plant that you want to grow to maturity. If the hosta that you are planting has a diameter of 2 feet, a hole of that size will encourage healthy growth.
What you find in the hole will guide your next steps. If your dirt is black down to the depth of a foot, then mix in manure and a shovelful of pea gravel. If you have a clay base, divide black dirt and clay. The clay (or other type of subsoil) should be used elsewhere. It often can be used to create vertical interest in your garden.
If you have access to a garden tiller, that will work great as well. You will give yourself more flexibility moving forward.
Planting the Queen of the Shade
Once your plant hole is dug to a foot in depth and to the outline of the plant, you are set to go. The black dirt that was extracted from the hole together with a bag of additional black dirt and manure should fill in the hole. If you want, you could add a shovelful of pebble gravel to improve circulation and drainage.

Next scoop a much smaller hole in the middle of the large hole for the small plant itself. Get your fingers dirty and rough up the roots so that they are free to grow in their new home. The top of the hosta should be level with the ground at about the same depth as the plant was in its container.
Never ever put a black plastic cover over the soil, it will prevent moisture from reaching the roots. Cocoa mulch looks great and eventually breaks down into the soil. Shredded pine bark also works well. Heavier wood chip mulches should be avoided.
At this point add water and let the sun do its work. If you have problem with rabbits, it may help to spray the small plants with a repellant. If you have deer pressure, pull up a chair and stand guard. A mix of water and Irish Spring soap can help.
Trimming Flowers and Dead Leaves

How to trim your hostas
Blooming is part of the hormonal, seasonal life cycle of the plant. If you cut off blooms before they open, the hosta can get confused and try to make more blooms, taking energy away from the plant. Let a few flowers open on each hosta before cutting, if cutting you must.
Cut the blooms after blooming is finished. If you are not a hosta growing professional, the seeds are unlikely to be hardy plants (compared to those produced by careful hybridizers). However, you can give it a try and see what you get.
Winter Preparation

Generally, hostas are very winter hardy and will survive nearly all winters from the Canadian border to the Carolinas. However, a bit of pre winter care can be helpful and keep your garden gems happy all winter long. Small plants are especially vulnerable to winter loss because their root systems only travel a few inches into the soil. So if you are time constrained, focus your winter prep on small hostas in their first couple of years of life.
Water until the first frost kills your garden plants. A good watering twice a week (unless a good natural rain happens) will help to keep the dirt moist. Second, when the plants die back and before the first snow, cover the plants with a layer of 4 to 6" of fluffy leaves. Make sure that you cover the crowns of the plant as this is most likely to be damaged by cold. This will trap a layer of air and protect plants from thawing and freezing.
Hail Damage
Hail damage is heartbreaking for hosta gardeners. Fortunately most hostas will recover in time. Early in the season remove the shredded leaves, water if necessary, and wait for new growth. Later in the season it may be necessary to live with some ragged leaves until new growth appears the following season.
Leave whatever is left of the damaged leaves intact, no matter how unsightly, because they will help keep producing food for the hosta until its new leaves emerge. How fast or if the leaves return is more dependent on how healthy the plant was to begin with and environmental factors like the availability of nutrients and water."

Watering and Fertilizing Hostas
All shade gardens love water, lots of it (at least 1" per week). Serious growers will see that their hostas get 1/2" of water three times a week. Your shade garden should be watered with a good soaking twice a week and maybe more if you have more than optimum sun exposure. Beautiful hostas are the sum of a big organic hole in the ground and lots of watering. Hostas are actually pretty adaptable to sunlight and heat as long as they get all of the water they need.
Hostas are actually pretty efficient at getting what they need from the soil, so if your soil is good, you may need no fertilizer at all. Many people (especially commercial growers) will use fertilizer, though. Any all-purpose fertilizer will do. Milorganite is used by many as it has additional deer-repellent properties. Hostas in pots should be fertilized a few times a season (or with a slow-release formula).

Splitting Plants
If you grow hostas, you will eventually attract friends and family that will want a piece of your action. These fans look at your plants much like a deer. Subtle questions come up at birthday dinners such as "How often do you split your hostas?" The person asking the question does not have a strong natural curiosity, they are really asking you if they could get a piece of your beautiful plants. Consider it flattery of highest form.
First, unlike other perennials, hostas do not need to be split. They will be fine for 25 years if you own the garden for that long. Do not split them just for the sake of making the hosta happier. It will not be. Neither will your prized plants be hurt by splitting. Second, splitting hostas is a great way to create new plants and to create good will with your friends. Large standout specimen plants are most likely to satisfy your admirers.
If you want to create a daughter plant, simply use a very sharp knife and remove one division of the plant from the parent. You can also dig up the parent and rinse the dirt off the roots with a hose. Then take a sharp knife and divide the plants into a handful of children. This latter approach is best if you have a large plant and you want to create multiple plants at one time.
Stopping Reversion
Many beautiful hostas are genetic "freaks." They came to exist in a hosta garden who was lucky enough to capture a unique plant. Unfortunately, that plant in your garden may put up a shoot that is boring green. The same process that gave you an unusual plant may work over the years to reclaim boredom.
As a first pass at stopping the conversion to the solid color, see if you can simply snap off the eye (shoot or division) at the base of the plant. If it comes up the next year with more of the solid color, you should dig up the plant and perform a bit of surgery to isolate the part you want to remove (for keeping or discarding). You’ll also want to do this if you want to save the part that’s a different color (say it was a solid hosta but now has variegation). Untangle the roots (by soaking in or washing with water), then use a sharp knife to cut the crown (central structure) around the eye or eyes you want to separate.

Avoiding Garden Invaders
Unfortunately, hostas seem to taste better to deer and rabbits than just about anything else that you might grow in the back yard. Rabbits are most problematic when your shoots are just coming out of the ground and deer are challenging whenever they might be passing by.
Commercial repellants are widely available and work well. When shoots are poking through, a daily or every other day application is recommended (probably for two weeks). Irish Spring soap can be sprayed on or chunked and thrown about the garden. After plants emerge, applying every other week is adequate and will keep your plants whole.
Managing Slugs

The more spectacular your hosta variegation, the more likely it will be susceptible to slugs. Slugs like cool and damp locations and the better you are at creating a hosta garden, the more likely you are to attract these pests. You have options and they all work well. 1) Commercial products are great, but can be expensive; 2) Do what you can to attract birds--they love slugs; 3)Use cocoa mulch--it smells great to humans and is hated by slugs; 4) Buy hostas that have thick heavy leaves that are not friends of these critters.
Virus X
Hosta Virus X continues to become widespread across the hosta growing zones. There is no remedy. Much research has taken place, with no real solution or cure for this virus.
Clean your tools by scrubbing with a 10% household bleach solution, Dawn dish detergent, and 70% isopropyl alcohol if you suspect Hosta Virus X. Wash your hands and/or change your gloves. If the suspect Hosta virus X brushed against your clothing, change your clothes before handling another non-infected Hosta. The virus is spread by the sap in the plant. If any part of the root, stem or leaf is broken it can seep onto/into tools, and clothing/gloves.
If you suspect and cannot clearly identify the virus this may be your solution to know for sure. If the test is positive for HVX, the result is the same; the Hosta must be destroyed. To destroy the plant, wait until it is dormant, or to expedite the process, use Round-up. It is a good idea to tie the plant up, so it does not touch another Hosta in the process of going dormant before removal.
Nematodes

Foliar Nematodes are microscopic round worms, which are not visible to the human eye. Nematodes live on the topside of the leaf and in the crown. They can devastate the appearance of a hosta leaf in a short period of time. They do not kill the plant, but they may weaken the plant by lowering its ability to generate energy for the next growing season. You will not know you have them until the leaves of your hosta show brown streaks between the vein tissue of the leaf. They do not cross the veins. Foliar nematodes can be found in over 250 other host plants.
Growing Hostas in Pots

As long as you plan for the needs of your Queen of Shade, hosta plants will grow very well in containers. Remember that potted hostas need water regularly just like those in a natural garden. Make sure you water them below the leaf canopy and around the crowns. Excessive wetting can mark the leaves.
At the same time, make sure that the container you plant your hostas in has good drainage. This can best be done by filling the bottom 2 or 3" of the pot with a layer of small pebbles. This is important to keep root rot from setting in.
While hostas can do quite nicely in pots, they do not make good houseplants. While they are shade plants, they cannot thrive while inside your home. They also require a period of sub-freezing to rejuvinate their roots. So pot your hostas and put them on the corner of your deck or patio, but let them freeze like all of the others plants in your yard.